Earworm
New 10th anniversary edition of my acclaimed novel about what happens when AI and the music business collide.
In this tutorial, you'll learn how to program in Python and I'll introduce you to the turtle module for creating graphics. This tutorial was written for Raspberry Pi, but the Python code works on Windows and Mac too.
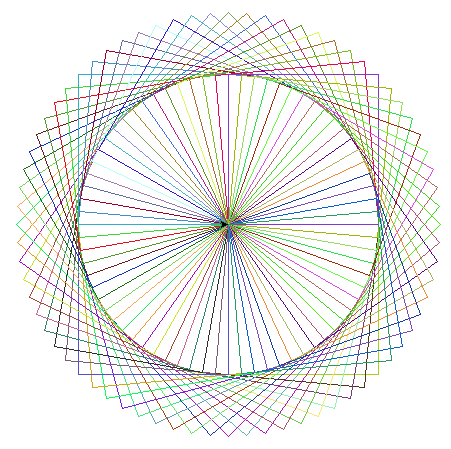
A circle of overlapping squares, drawn with the Python turtle
Don’t be afraid of the snake: Python might look intimidating if you haven’t done much programming before, but it’s friendly. If you’re using a text-based programming language for the first time, Python is a great choice. Raspberry Pi Foundation founder Eben Upton has called Python his favourite language for learning and development, and it’s a natural next step after Scratch.
If you’re an experienced programmer, you’ll find Python is powerful and helps you to be productive. It’s not just an educational language: Google hires Python programmers and the language was used by Industrial Light and Magic in producing Star Wars: Attack of the Clones. With all those spaceships and light sabre fights, few people noticed the Python in the background.
Today, Python is widely used for statistical analysis and for creating artificial intelligence applications. According to Stack Overflow’s 2023 Developer Survey, Python is the third most popular coding language, behind JavaScript and HTML/CSS, which are both used for creating websites. Python is the world’s most popular programming language as of January 2026, according to the TIOBE Index which measures the strength of the ecosystem around a language.
On Raspberry Pi, the default Python editor is Thonny. You can download Thonny for Windows and Mac, too. The lower window is the Python Shell. The >>> prompt means that Python is ready for you to give it an instruction, which it will carry out straight away.
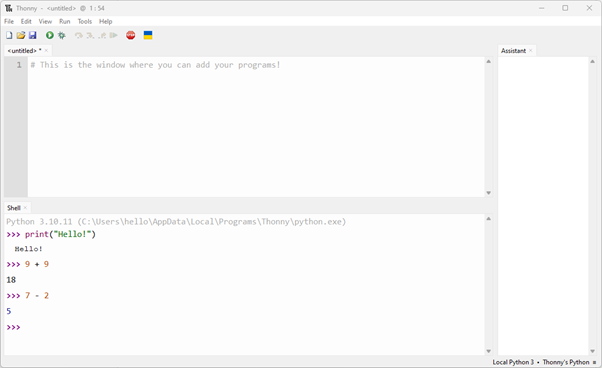
Thonny’s Shell (bottom left) is used to run commands immediately. Write your programs in the upper window. The Assistant window provides help when there are errors.
Try typing this in the Shell:
print("Hello!")The print command has nothing to do with printers: it’s used in Python to write text on the screen, so when you press Enter, the computer will write a friendly “Hello!” before returning you to the prompt. You can change what goes between the quote marks to display any message you like. With commands like this, make sure you have matching opening and closing brackets, and opening and closing quotes.
Python is case sensitive, which means you can’t use upper case in place of lower case, or the other way around. If you try entering the command with a capital P, you’ll get an error message, shown in red to hammer home the point. The words “print” and “Print” look similar to us, but to Python they’re completely different.
I used to know a joke about a snake who borrowed money and when he came to repay it, he hadn’t worked out the amount plus interest correctly. It was because he was a poor adder.
Luckily I can’t remember that joke any more (ahem!), but you’ll be pleased to know that Python is an excellent calculator. You can just type sums into it, and it’ll tell you the answers. You use the + and - symbols for addition and subtraction, / for division and * for multiplication.
Try, for example:
9 + 9
7 - 2
8 * 7
9 / 2
These sums are trivial (except perhaps 8*7: many people get hazy around that part of the times tables), but they’re good for testing.
This works in the Shell because when you enter something that isn’t a command (or something Python can do), it evaluates what you give it. That means it asks itself “what is…?” plus whatever you entered, and gives you the answer.
You’ll notice that I’ve used a space either side of the maths symbol here. I could have used several spaces, or none at all, and it would work equally well. The difference, though, would be readability. One of the reasons Python is a great language is that it’s designed to be easy to read. The language has strict rules about how you indent some lines to make your programs easy to skim, as you’ll see shortly. But there’s also a strong community around Python that evangelises readability, and has its own conventions as to what constitutes true “Pythonic” code. One of the guidelines is that you use one space each side of a maths symbol like this.
When you use the Shell, your instructions are carried out (or “run”) straight away. Most of the time, you’ll want to store your instructions as a program so you can run them later. It means you can repeat the instructions without having to type them in again, and also enables you to write instructions that respond to what’s happening at the time the program is run.
To make a program, you enter it into the upper window in Thonny. You can start a new program by clicking the File menu at the top of your Thonny window and choosing New. There’s a keyboard shortcut of Ctrl+N too.
Type in the following program:
print("Snakes alive!")
print("I’m a Python programmer!")
This time, when you finish typing a line and press Enter, the cursor just goes to the start of the next line, ready for you to type in the next line. None of the commands are run until you’re ready. You can add more lines of text if you want to, or write a program that displays your favourite poem or the lyrics to your favourite song.
You can save your program using the File menu, and you will also be reminded to save when you close Thonny.
When you’re ready to run your program click Run on the menu at the top of the window.
When your program runs, your text is printed in the Python Shell. You can go back to the script window where you wrote your program to edit it and develop it further.
There’s an important difference between the Shell (where commands are carried out straight away) and the programs you write. If you include a sum in a program, the result doesn’t appear on screen because you have to tell Python what to do with the result. You can use the print command to tell it you want it to appear on screen, like this:
print(5 * 5)You can give Python new capabilities by bringing in modules that other people have written. These are just programs that are designed to be reusable and customisable, and you’ll regularly use modules for things like generating random numbers or timing in games.
The turtle module gives you an arrow on screen that you can move around by giving it directional commands, similar to the way that you move sprites in Scratch. It’s a handy visual way to familiarise yourself with Python and see the result of what you’re doing. You bring a module into your program by using the import command, together with the name of the module you want to use.
Start a new program using the File menu, and then enter the following:
import turtle
turtle.forward(150)
When you run the program, you’ll see a new window open called Python Turtle Graphics. In the middle of the screen is an arrow facing right (the turtle). As you might expect, the arrow moves 150 pixels in the direction it’s facing, which is right, and draws a line. If you’ve used Scratch before, this will feel familiar to you.
You can change the direction the turtle is facing by using turtle.right() and turtle.left(), with a number of degrees in brackets. For example, to make the turtle turn left by 45 degrees, use:
turtle.left(45)You could add this command to your program and run it, or type it into the Shell. In either case, you’ll see the turtle head turn.
Try the following program to draw a square:
import turtle
turtle.forward(150)
turtle.right(90)
turtle.forward(150)
turtle.right(90)
turtle.forward(150)
turtle.right(90)
turtle.forward(150)
There are several problems with this program: First, it’s a pain to write. You can copy and paste in the editor, but you’re doing the manual work of adding the same instruction several times when computers are great at repetition. Second, it’s a pain to read because you can’t easily see what the program does. Finally, it’s a pain to modify. If you want to make the program draw a triangle, you’ll have to do a lot of editing.
The solution, as you might already have guessed, is to write a program that repeats the draw and turn instructions as many times as needed. Here it is:
import turtle
for g in range(4):
    turtle.forward(150)
    turtle.right(90)
The second line in this program tells Python that you want to repeat the next bit four times. It does a little bit more than that, in fact. It creates a variable (which is a place for storing information) and calls it g. It puts the numbers 0, 1, 2, and 3 into that variable in turn, taking the next one from the list each time it repeats. We don’t need that for this program, but it happens anyway. Programmers often use an underscore symbol (_) instead of a variable name (in this case, g) when they don’t need to use the numbers.
Look out for the colon at the end of the second line. When you press Enter after it, the next line is automatically indented for you. The way you tell Python which instructions belong to the for command above is by indenting them. The convention is to use four spaces, and the program won’t work if you don’t use indentation consistently. By forcing you to use indentation, Python makes sure your programs (and everyone else’s) are easy to read.
Parts of a program that repeat are often called loops. The loop is much easier to work with than all those individual draw commands. If you decide to draw a triangle instead of a square, for example, you can just change the for command to repeat 3 times, and the angle of the turn to 120 degrees.
There are several different ways you can change the pen colour. One of them is to tell the turtle module how much red, green and blue you want mixed into the final colour. The maximum amount of blue, with no green or red would be pure blue, for example, and the maximum amount of red and green with no blue produces yellow.
To make the turtle draw yellow lines, use:
turtle.colormode(255)
turtle.pencolor(255, 255, 0)
You only need to include the first line once in your program to tell the turtle module what format you want to specify colors in. The second line gives the amount of red, green and blue (in that order) on a scale from 0 to 255, and you can use it whenever you want to change the pen colour. Try experimenting with different numbers.
You’ll notice that the word ‘color’ is spelled the US way here. It won’t work if you slip a ‘u’ into it.
We can get the computer to choose color numbers at random for us. To do that, we’ll need to use another module called random. Add import random at the start of your program, and then you can generate a random number like this:
random.randint(0, 255)Try typing that into the Shell to see it working. The first number in the brackets is the lowest possible number you want and the second number is the highest. Each time you enter it, you’ll get a random number in that range. If it repeats, it’s a coincidence, like throwing a double six.
Replace your color numbers in the turtle.pencolor() instruction with the code that generates a random number, like this:
turtle.pencolor(random.randint(0,255), random.randint(0,255), random.randint(0,255))Don’t press Enter at the end of the first line: Finish the whole instruction before you press Enter. That instruction will change the pen to a random color each time you use it. Remember that each opening bracket needs a closing bracket of the same type, so if you get an error, check your punctuation first. Make sure, too, that you add import random at the start of your program.
You can put loops inside loops, so you could create a program that draws lots of squares, for example. Here it is:
import turtle
import random
turtle.colormode(255)
for h in range(72):
    turtle.pencolor(random.randint(0,255),  random.randint(0,255), random.randint(0,255))
    for g in range(4):
        turtle.forward(150)
        turtle.right(90)
    turtle.right(5)
This small program brings together everything you’ve learned in this article. It uses the turtle and random modules, sets up the turtle’s colour mode, and then starts a loop that repeats 72 times. The turtle is given a random pen color, and then a square is drawn using a loop that draws four sides, turning 90 degrees after each one. Finally, the turtle turns right 5 degrees before drawing the next square. The result is a circular pattern made of overlapping multi-coloured squares. See the screenshot at the start of this article.
The important thing to notice here is that the loop for drawing the square has all been indented by a further four spaces so that it belongs to the loop that repeats 72 times. The number 72, by the way, is calculated by taking 360 degrees in a circle and dividing it by 5, the number of degrees we turn between drawing each square.
The turtle can do much more than this. If you’d like to experiment further, see the documentation at http://docs.python.org/3.3/library/turtle.html.
Sean McManus is co-author of Raspberry Pi For Dummies and author of Mission Python and Scratch Programming in Easy Steps. An older version of this article was originally published in Raspberry Pi Geek magazine.
© Sean McManus. All rights reserved.
Visit www.sean.co.uk for free chapters from Sean's coding books (including Mission Python, Scratch Programming in Easy Steps and Coder Academy) and more!
New 10th anniversary edition of my acclaimed novel about what happens when AI and the music business collide.
A free 100-page ebook collecting my projects and tutorials for Raspberry Pi, micro:bit, Scratch and Python.
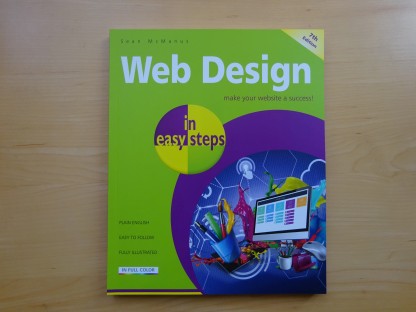
Web Design in Easy Steps, now in its 7th Edition, shows you how to make effective websites that work on any device.
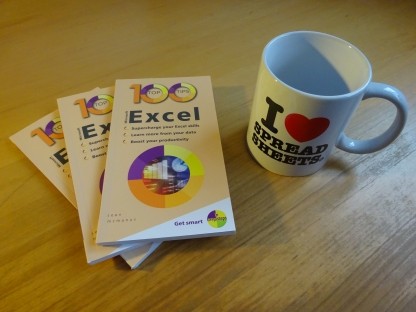
Power up your Microsoft Excel skills with this powerful pocket-sized book of tips that will save you time and help you learn more from your spreadsheets.
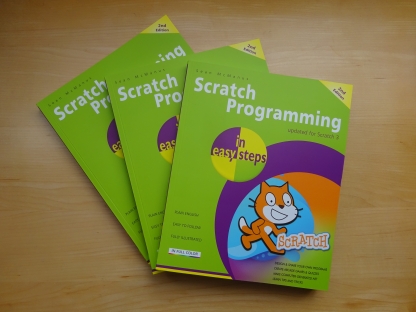
This book, now fully updated for Scratch 3, will take you from the basics of the Scratch language into the depths of its more advanced features. A great way to start programming.
Code a space adventure game in this Python programming book published by No Starch Press.
![]() Top | Search | Help | Privacy | Access Keys | Contact me
Top | Search | Help | Privacy | Access Keys | Contact me
Home |
Newsletter |
Blog |
Copywriting Services |
Books |
Free book chapters |
Articles |
Music |
Photos |
Games |
Shop |
About