
Coding Compendium
A free 100-page ebook collecting my projects and tutorials for Raspberry Pi, micro:bit, Scratch and Python. Simply join my newsletter to download it.
Sean McManus explains how you can take control of the Amstrad CPC character set with user defined graphics (UDGs) and control codes, so you can make custom graphics and typefaces
For those of us who still get emotional about the demise of the ZX-81, user defined characters still have a special place in our hearts. To begin with they were the only way to create characters. The CPC's character set includes some little men and other shapes which it is always handy to remember, but the real power is in creation. Frankenstein, here we come.
If you have a look at the complete character set in the back of manual, it becomes clear that each character is built from sixty four blocks in an eight by eight grid. To create your own character, you need to use two commands. SYMBOL AFTER x will tell the computer how much of the character set you intend to redefine. It needs to know this so it can set memory aside and it will then allow you to define characters after the value specified. If SYMBOL AFTER and MEMORY come into conflict, see "The Road to Code" section for a remedy.
To actually define the character you need to provide a number for each row. This number is calculated by totting up the binary values: in binary each digit is either a one or a zero and so this is ideal for our grid where each block is either on or off. Traditionally, defining characters was a game played with squared paper and calculator. The disc contains a more friendly UDG (user defined graphic) definer. Instructions are given on screen and it constantly updates the list of values.
Now, thanks to the magic of Amstrad emulation, you can use the UDG Definer in your browser right now. You don't have to load a new utility on your CPC or emulator to create your graphics data, so you can keep programming without interruption.
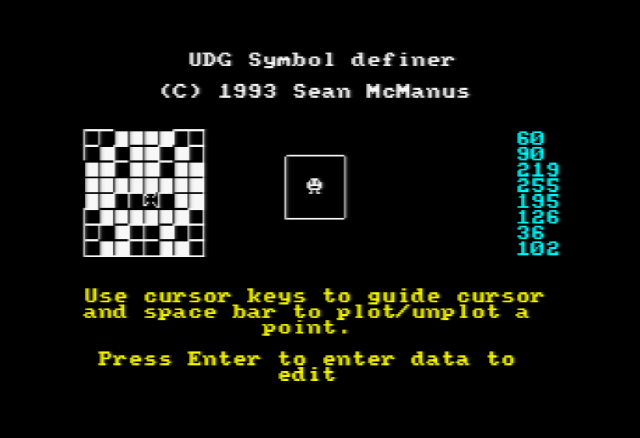
UDG Definer generates the numbers you need for your SYMBOL command. Try it in your browser now!
When you have something you like, note the list of numbers and place them in a SYMBOL command from top to bottom. Here's an example of a character I created, nestling between an appropriate SYMBOL AFTER and a print command to display it.
SYMBOL AFTER 239: SYMBOL 240,60,90,219,255,189,195,102,60:PRINT CHR$(240)
He doesn't have a name or a game to live in, but you get the picture. If you want to edit him, press enter or return in the definer and tap in the list of numbers. Using this method it is possible to create spaceships, aliens, Pac-persons and any other graphic. It is also possible to place characters alongside one another to increase the size of the graphic you can create.
You can redefine any normal character from the character set and choose how it appears every time it is used. You can, therefore, customise the character set by creating an alternative pattern for each letter of the alphabet, using the UDG definer, and then writing a program to issue the relevant SYMBOL commands. This can add atmosphere to an adventure game if the character set chosen is appropriate or could be used to stamp your preferred style on your programs. The disc contains a demonstration character set called "Datarun". It sets both upper and lower case as the same because you don't usually get lower case futuristic characters and this prevents things looking odd if the occasional lower case character should drop in. I haven't defined any punctuation or non-alphabetic characters: Listing the program will show this and you might like to look at extending the set to include numbers. "Datarun" was written from start to finish in an hour using the UDG definer.
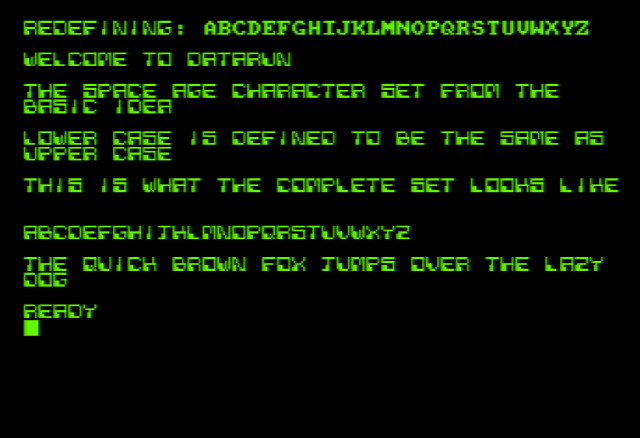
Screenshot of Datarun
When defining character sets, don't use the whole grid. This would make your characters touch each other and blur them. I left the right hand column and the bottom row empty (which saved me having to list it in the data). As long as you're consistent throughout the set, it doesn't matter which sides you ignore. Like most finishing touches, redefining the character set can put some people off. In particular, some characters might not be as clear to the user as the creator. Some of the characters in "Datarun" lean on their context a little to ensure legibility. This becomes even more critical in adventure games where the player has to be able to read the text easily throughout. If you want to edit any of the characters, take the symbol data from the program and feed it into UDG definer. Remember the last row in this character set is always zero and it doesn't feature in the DATA list.
The normal character set kicks off at CHR$(32) with the space character. Characters zero to thirty one are control codes. This means that when they are printed to the screen, they don't appear as shapes like most characters do. Instead, they make something happen. Most people are familiar with PRINT CHR$(7) which makes the machine beep as if an error in entering a command had occurred. Some of the other control codes are more useful than this and can take parameters like commands. Try the following example:
PRINT CHR$(4)CHR$(0)
Assuming you were not already in the chunkiest screen mode, you will have noticed the change. The first chr$ works like a MODE command. CHR$(4) means MODE in the same way CHR$(7) means BEEP ANNOYINGLY. The second character here sets the actual mode number. Now you're in mode zero, try changing the second number to 2 or 1 and reprinting both characters.
Using characters in this way, you can execute LOCATE, MODE, PEN, PAPER, WINDOW and a few others. Moreover, you can do things that Basic forgot about. When you print a character on screen, it usually fills the space around the character with the paper colour. This wipes out any background you had wanted to keep. Using CHR$(22) you can overcome this.
PRINT CHR$(22)CHR$(1) will turn transparent mode on.
PRINT CHR$(22)CHR$(0) will make the paper opaque again.
This can be especially useful when using the TAG command and wanting to overlay your own characters on a line drawn background. It is important to put a semi-colon on the end of any print statements when using TAG, otherwise it appends a carriage return and line feed symbol. Although these characters from the early part of the set don't usually show their patterns, they do have them and if you print them while TAG is on, you will get the symbols and not the desired effect.
CHR$(1) will enable you to see the shape behind the character when tag is off. Print CHR$(1) followed by the chr$ whose secret identity you wish to discover. PRINT CHR$(1)CHR$(7) produces an omega character. Curiously enough, holding down control and pressing G will produce the same character and if you enclose it in quotes and PRINT it, the machine will beep. It's no coincidence that G is the seventh letter of the alphabet. You can use CHR$(1) to display the pattern of any control code and can use the copy cursor to put it into a print command directly, cutting out the CHR$ business. Be aware that if you intend to distribute your programs as listings, these characters will usually not come out on a printer.
A complete list of the control codes concludes this section, but you might have a nagging question at the back of your mind. Why is this such wonderful news if we can use the Basic commands much more easily? The point is that these control codes can be included in strings. You can have a string which displays your message in the middle of the screen and sets up the mode, inks, LOCATE and pens and paper to do it. All in one concise chunk. The demonstration program on the disc DEF FORMATTING shows this in action.
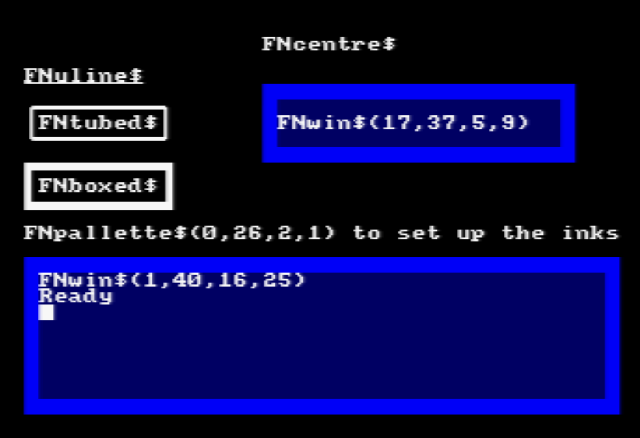
DEF FN allows you to define user functions. In this case, the user functions are special strings which take our input and polish it for presentation before displaying it:
The program includes other examples and how they can be used. They can do the work of a subroutine without needing to remember any line numbers and without needing to make sure that the same variable is always used for the text. No variable at all is needed for the text to be boxed using control codes.
Screenshot of my DEF Formatting program
Silly example time! Bus Stop shows a bus queue, built up from men defined using UDGs (the head) and the normal character set. Closer inspection of the listing will show that it was all done using control codes. The program just reads data and prints it out. Since the CPC's default character set includes the building blocks of teletext, you could easily create your own information display system.
The Kojak appreciation society awaiting a bus.
The control codes for moving the text cursor came in handy here. Numbers 10 and 11 can be used for rolling the screen off. The game Paclone (on the disc) creates two windows and uses these control codes to roll the screen into the middle at the end of the game.
LOCATE 1,1:PRINT STRING$(25,11);

LOCATE 1,25:PRINT STRING$(25,10);
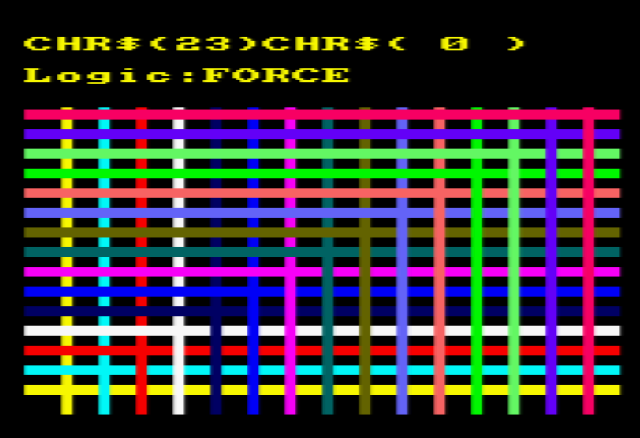
Control code 23 enables you to influence the plot mode. 6128 owners will be familiar with the extra parameter on some of their commands which can set this (see the Downgrading chapter). This allows the foreground and background to influence one another when you plot on the screen. The usual plot mode is FORCE, which stomps all over whatever used to be there. The other plot modes break the colour numbers down to binary and work on each of the individual bits. (Binary numbers are made up from strings of zeroes and ones called bits). With the OR plot mode, for example, if a bit is 1 in either number then that bit stays one in the final number.
There is a program on the disc called Logix which demonstrates these plot modes in action.
Drawing a striped grid in force mode, it's clear that whatever was drawn last rubs over whatever used to be there.
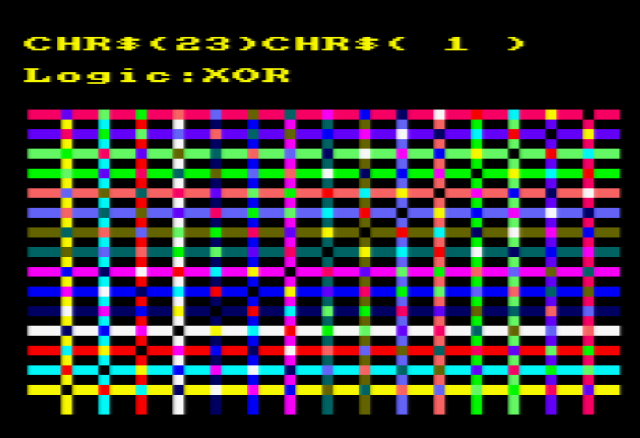
The XOR plot mode is probably the most useful because the points where lines of the same colour cross are zero. This means that drawing the same thing in the same colour at the same place will erase it again. This becomes important for using sprites later on.
The OR mode can be used to good effect. Where lines 3 and 2 cross, a point is plotted in pen 3. If you want to draw something in front of something else, using two for the background and three for the foreground makes it easy when the plot mode is OR. Pens 1 and 2 give 3 at their intersection. Try breaking out here and changing the ink in pen three. Setting it to 24 makes it look like one is in front; INK 3,20 makes it look like pen two is.
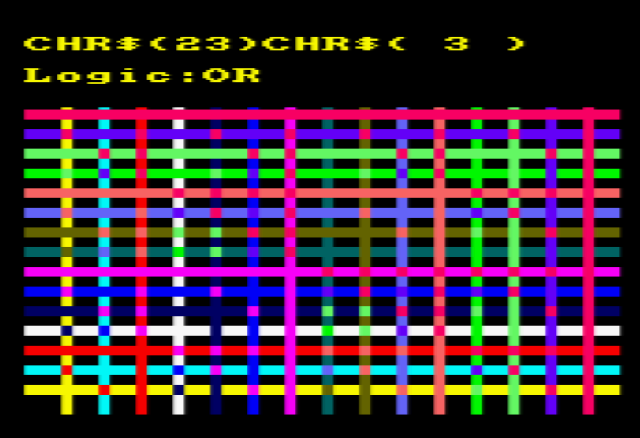
These effects are used throughout the Basic Idea. From the title screen fade, to the sliders in the Sound Envelope Definer (XOR), logical plotting makes sense.
You can refer to these on-screen grids in future as necessary.
This section has shown how you can use control codes to tidy up your screens and create your own characters. It can take imagination to put a user friendly front end onto a utility, but DEF FORMATTING gives you the tools to do it (as used on some programs in the Road to Code section). Using sixty four building blocks, you can create your own typeface, your own space ship or your very own Frankenstein: A character building experience, indeed.
In the next chapter we look at how to use colour swapping to bring him to life...
| Control Codes lookup table | |
|---|---|
| 0 | Nothing |
| 1 | Takes one parameter. Like CHR$, but also works for control codes. |
| 2 | Disable cursor (not very useful) |
| 3 | Enable cursor (neither) |
| 4 | MODE command. One parameter. |
| 5 | Display a character at graphics cursor. One parameter. |
| 6 | Another useless cursor handling command: TXT VDU ENABLE |
| 7 | Beep! |
| 8 | Move text cursor left |
| 9 | Move text cursor right |
| 10 | Move text cursor down |
| 11 | Move text cursor up |
| 12 | CLS |
| 13 | Carriage return. Text cursor leaps to left of window, stays on same row. |
| 14 | PAPER. One parameter |
| 15 | PEN. One parameter |
| 16 | Delete |
| 17 | Clear window left to cursor |
| 18 | Clear cursor to window right |
| 19 | Clear window start to cursor |
| 20 | Clear cursor to window end |
| 21 | Another cursor routine: TXT VDU DISABLE |
| 22 | Set transparent (1) mode or opaque (0). One parameter |
| 23 | Sets plot mode. One parameter |
| 24 | Inverts the current pen and paper |
| 25 | SYMBOL command. Followed by nine parameters: symbol number and data |
| 26 | Sets window to four parameters given. Left,right,top,bottom |
| 27 | Nothing |
| 28 | INK command, followed by three parameters always |
| 29 | BORDER command, followed by two parameters always |
| 30 | Cursor Home |
| 31 | LOCATE, followed by x parameter and y parameter |
Find all my Amstrad CPC tutorials here, and download my updated software disc here!
© Sean McManus. All rights reserved.
Visit www.sean.co.uk for free chapters from Sean's coding books (including Mission Python, Scratch Programming in Easy Steps and Coder Academy) and more!
A free 100-page ebook collecting my projects and tutorials for Raspberry Pi, micro:bit, Scratch and Python. Simply join my newsletter to download it.
Web Design in Easy Steps, now in its 7th Edition, shows you how to make effective websites that work on any device.
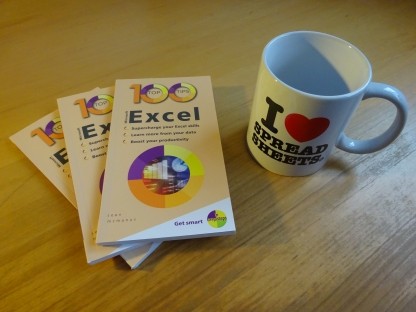
Power up your Microsoft Excel skills with this powerful pocket-sized book of tips that will save you time and help you learn more from your spreadsheets.
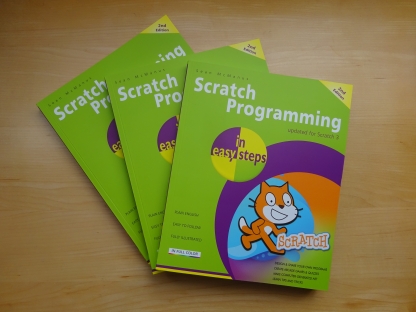
This book, now fully updated for Scratch 3, will take you from the basics of the Scratch language into the depths of its more advanced features. A great way to start programming.
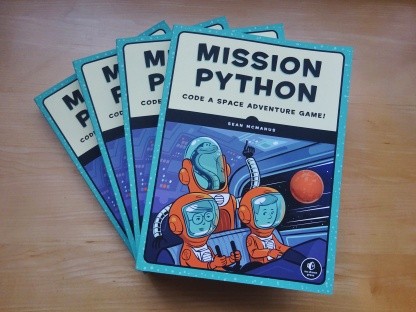
Code a space adventure game in this Python programming book published by No Starch Press.
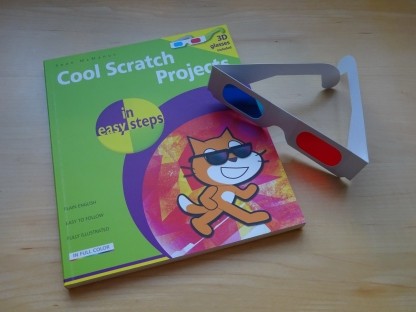
Discover how to make 3D games, create mazes, build a drum machine, make a game with cartoon animals and more!
![]() Top | Search | Help | Privacy | Access Keys | Contact me
Top | Search | Help | Privacy | Access Keys | Contact me
Home |
Newsletter |
Blog |
Copywriting Services |
Books |
Free book chapters |
Articles |
Music |
Photos |
Games |
Shop |
About